阿里云百炼简介
阿里云的大模型服务平台百炼是一站式的大模型开发及应用构建平台。不论是开发者还是业务人员,都能深入参与大模型应用的设计和构建。您可以通过简单的界面操作,在5分钟内开发出一款大模型应用,或在几小时内训练出一个专属模型,从而将更多精力专注于应用创新。
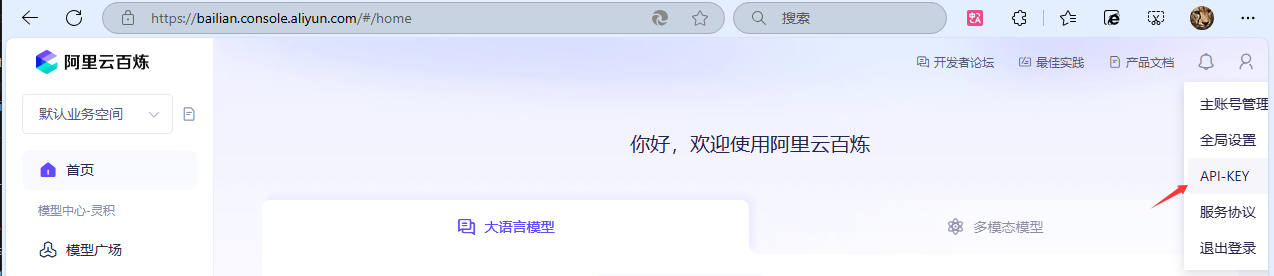
开通百炼并创建API KEY 有阿里云账号的用户,打开这个链接:https://bailian.console.aliyun.com,先开通百炼。API Key,创建一个API Key。
建议每一种用途都创建一个单独的API KEY。
然后,就没了,不需要其他设置了,我一度以为还需要选择模型。
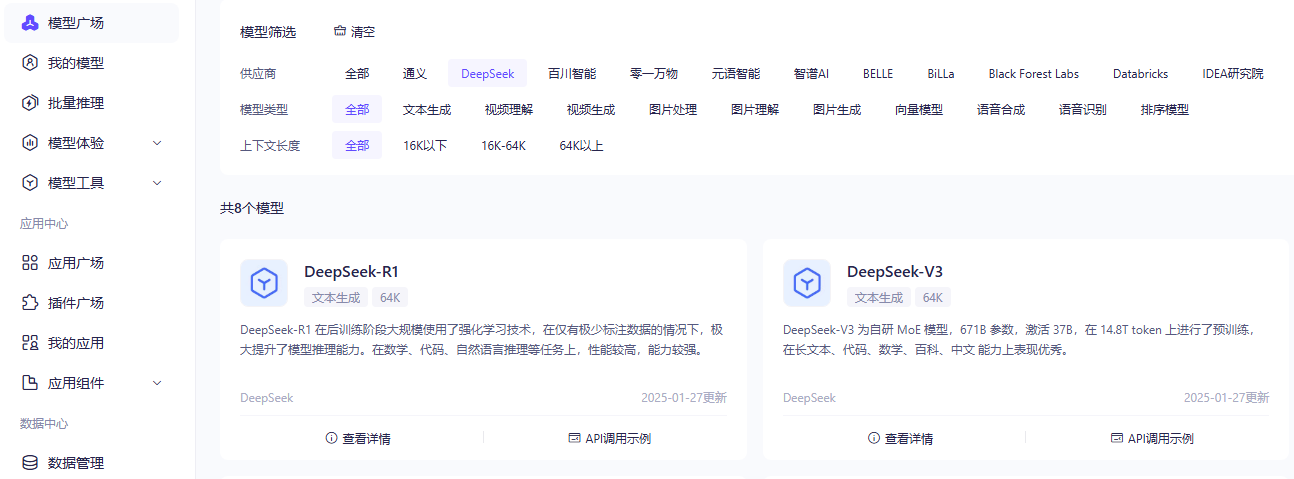
API调用示例 在“模型广场”上,用DeepSeek筛选,每个模型都有“API调用示例”
比如DeepSeek-R1的http示例(重点是url地址和模型名称):
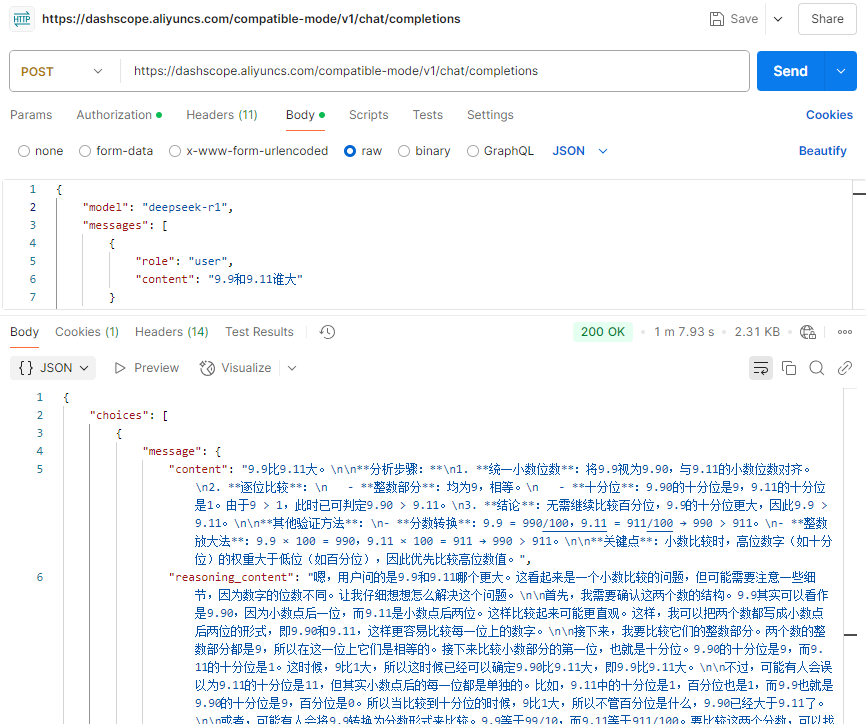
1 2 3 4 5 6 7 8 9 10 11 12 curl -X POST https://dashscope.aliyuncs.com/compatible-mode/v1/chat/completions \ -H "Authorization: Bearer $DASHSCOPE_API_KEY " \ -H "Content-Type: application/json" \ -d '{ "model": "deepseek-r1", "messages": [ { "role": "user", "content": "9.9和9.11谁大" } ] }'
用Postman测试
Authorization: Bearer $DASHSCOPE_API_KEY
第一次非常慢,用时超过1分钟。笔者切换了一下模型,多次尝试,deepseek-r1耗时在30秒左右,deepseek-v3耗时在5-10秒。
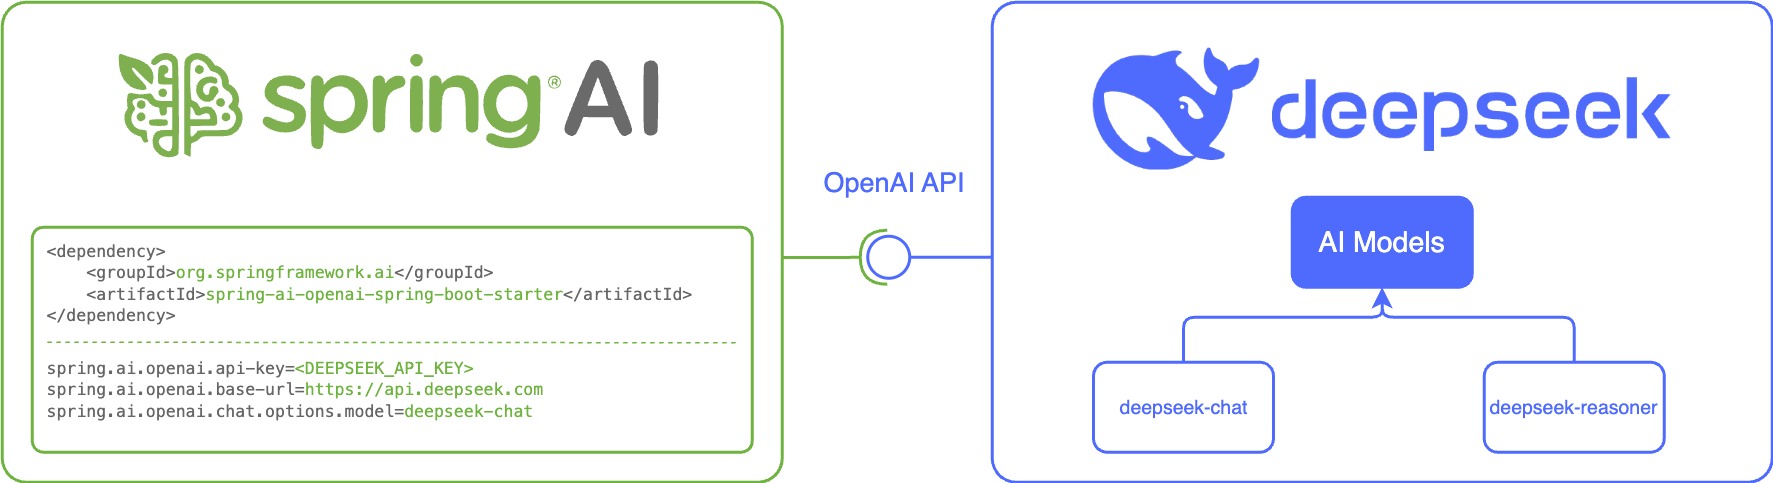
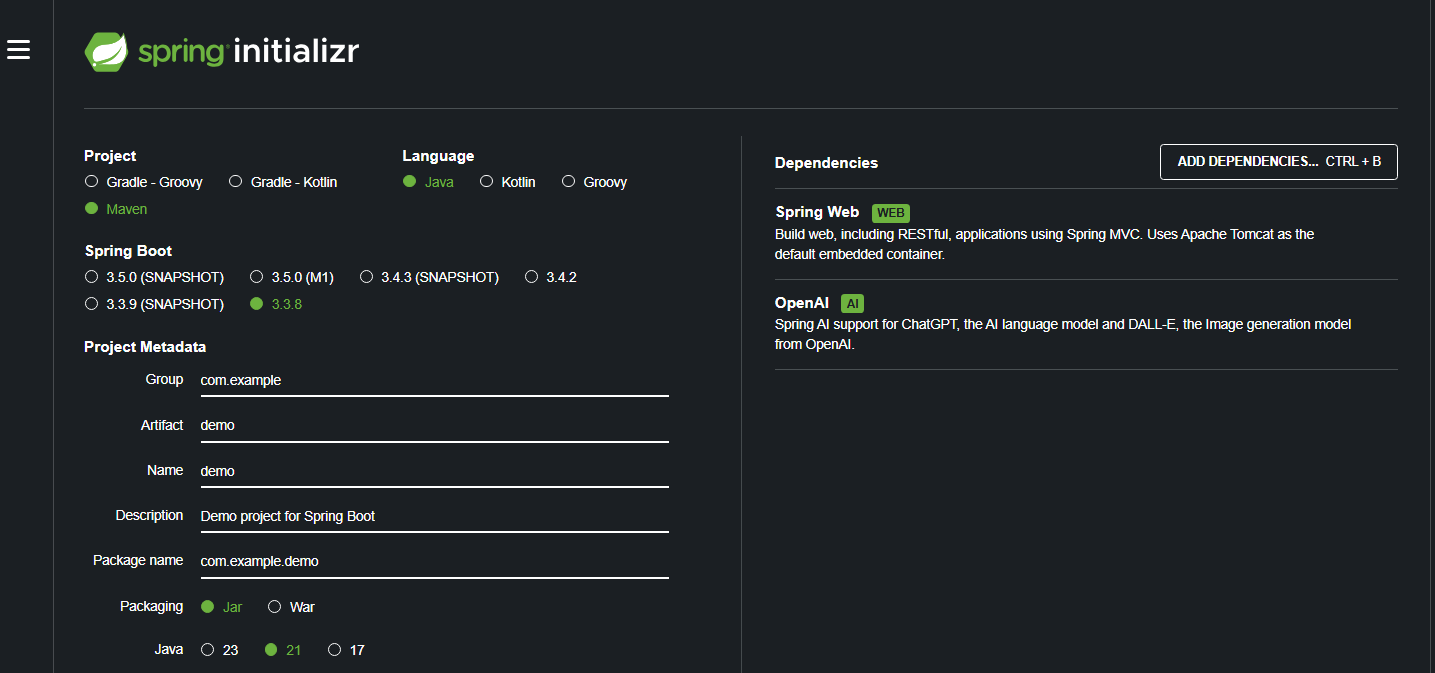
在Spring AI中调用百炼上的DeepSeek 初始化项目 可以在https://start.spring.io上快速初始化一个Spring AI 项目,笔者撰写本文时,使用的Spring AI 1.0.0-M5。
MyController.java 1 2 3 4 5 6 7 8 9 10 11 12 13 14 15 16 17 18 19 20 21 22 23 24 25 package com.example.demo.controller;import org.springframework.ai.chat.client.ChatClient;import org.springframework.web.bind.annotation.GetMapping;import org.springframework.web.bind.annotation.RequestMapping;import org.springframework.web.bind.annotation.RequestParam;import org.springframework.web.bind.annotation.RestController;@RestController @RequestMapping("/ai") public class MyController { private final ChatClient chatClient; public MyController (ChatClient.Builder chatClientBuilder) { this .chatClient = chatClientBuilder.build(); } @GetMapping("/hello") public String hello (@RequestParam String userInput) { return this .chatClient.prompt() .user(userInput) .call() .content(); } }
修改配置 把application.properties改名为application.yml,按兼容OpenAI的方式进行配置:
1 2 3 4 5 6 7 8 9 10 11 12 13 14 15 16 server: port: 8081 shutdown: graceful servlet: context-path: / spring.application: name: demo spring.ai.openai: api-key: sk-*** base-url: https://dashscope.aliyuncs.com/compatible-mode chat.options: model: deepseek-r1 log: level: root: debug
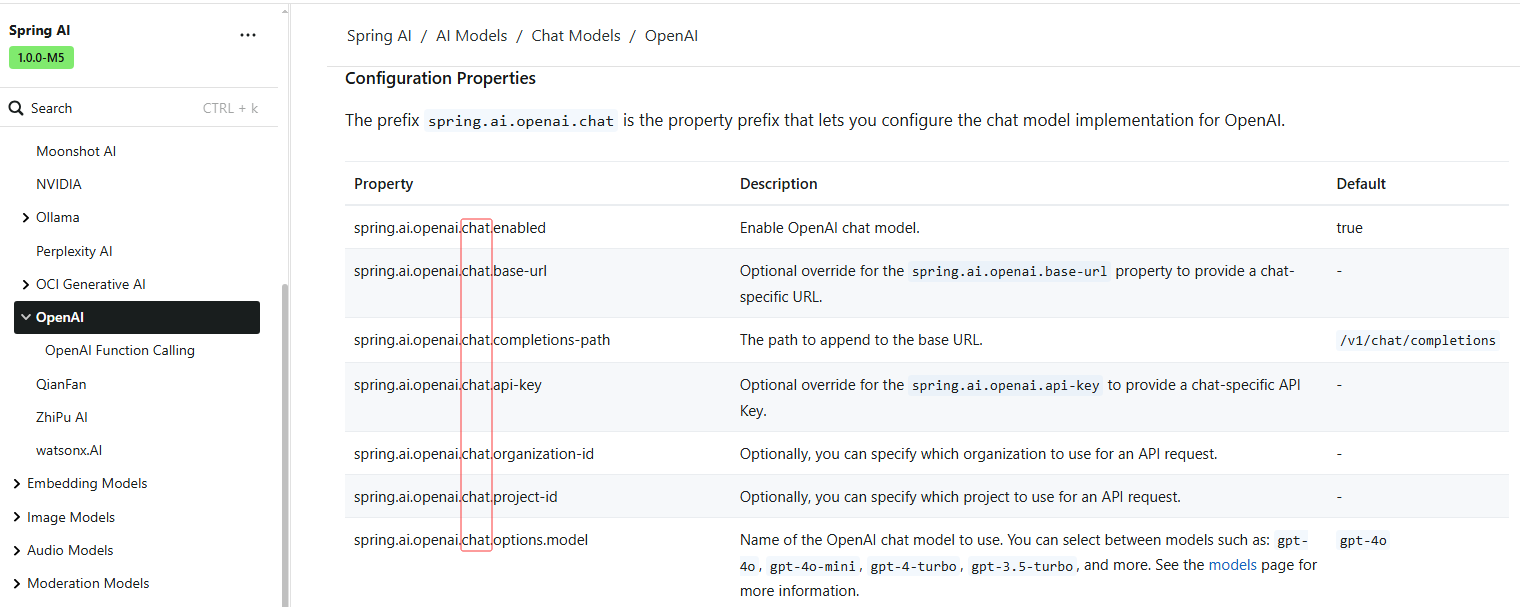
OpenAI参数,参考:https://docs.spring.io/spring-ai/reference/1.0/api/chat/openai-chat.html
避坑指南一:spring.ai.openai.chat,但实际测试api-key和base-url的前缀是spring.ai.openai,没有chat,而options.model则跟文档是一致的。api-key和base-url配错路径的异常: java.lang.IllegalArgumentException: OpenAI API key must be set. Use the connection property: spring.ai.openai.api-key or spring.ai.openai.embedding.api-key property.model配置错误的异常: org.springframework.ai.retry.NonTransientAiException: 403 - {"error":{"code":"access_denied","message":"Access denied.","type":"access_denied"},"request_id":"ce3e85e8-b82c-9cff-87e5-42b6e85c2a4e"}。
避坑指南二:base-url配置时,要把/v1去掉,Spring AI的ChatClient会自动添加/v1/chat/completions,添加了v1的异常信息为java.io.FileNotFoundException: https://dashscope.aliyuncs.com/compatible-mode/v1/v1/chat/completions
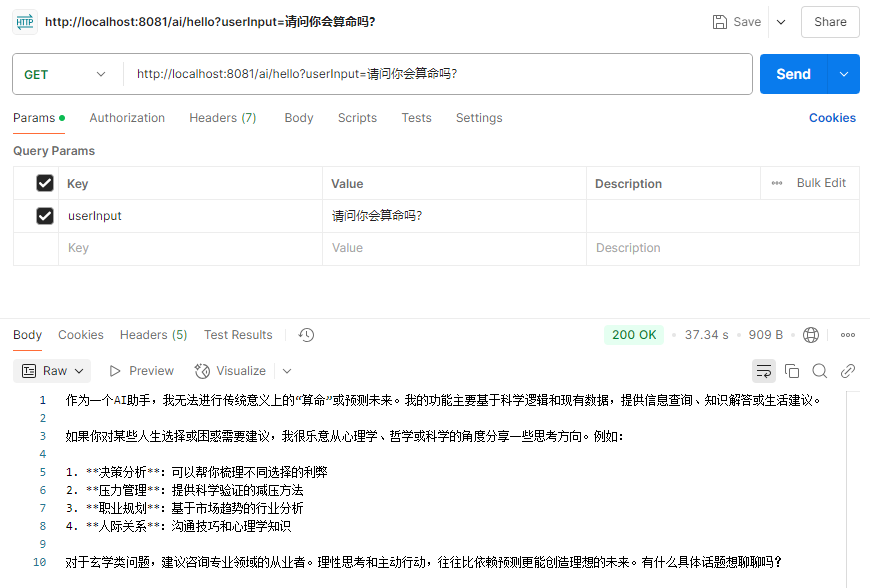
用Postman测试